Tips and Advice
Create your own Photoshop brush in 10 easy steps
Let’s talk Photoshop. Whether you love it, hate it, or love to hate it – there’s no denying that it’s a valuable tool in any designers armoury. We know that with so many gizmos, tools and options, it can be a little overwhelming even for the most experienced users. But, one great feature that you might not be aware of, is the tool that allows you to create your own Photoshop brush – how cool is that?
Creating your own brush allows you to create intricate overlaid designs (it’s great for watercolour designs), or create a logo brush to use over and over again. It’s easy to change the size, opacity and colour too, in just the click of a button – forget duplicating layers!
Ok, so without further ado, follow the steps below and start creating your own brushes today! Don’t forget to show yours off using #ProudlyPrinted too – we’d love to see what you create!
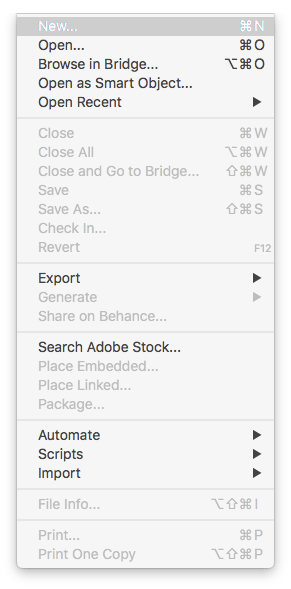
Step 1
Open a New Document in Photoshop
The first step is to go to the File menu and then to select ‘New…’ from the drop-down list. This will open a new Photoshop document. Alternatively, if looking for a quicker option, you can key Ctrl+N which will perform the same function.
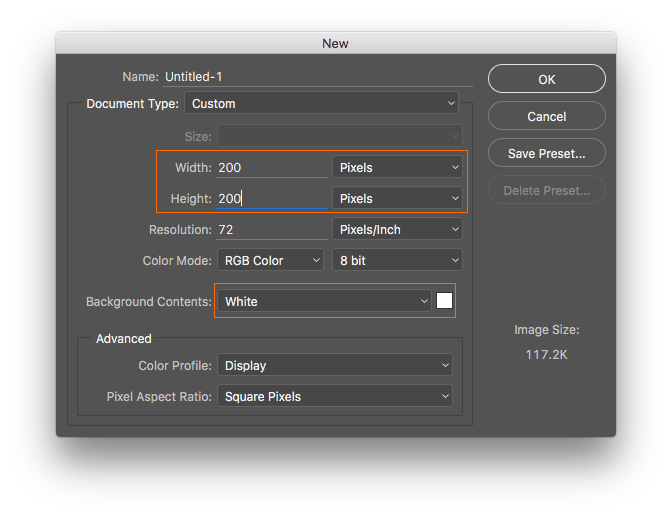
Following this, a box will appear that allows you to select the desired width and height for your brush. At this stage, you also need to choose a white background colour before pressing OK. A white pixel document should now be present on your screen.
Your brush will be pixel-based and as such will respond as a standard image would when resized. Though you can resize your brush, the initial size at which it is produced will be selected as the default.
When choosing your brush size, you need to take memory size and brush precision into consideration. The larger the brush, the less accuracy you will have when designing.
If you are aiming for a softer, less defined image then a large brush may be what you need. However, larger brush sizes take up more memory and could reduce your computer speed as a result.
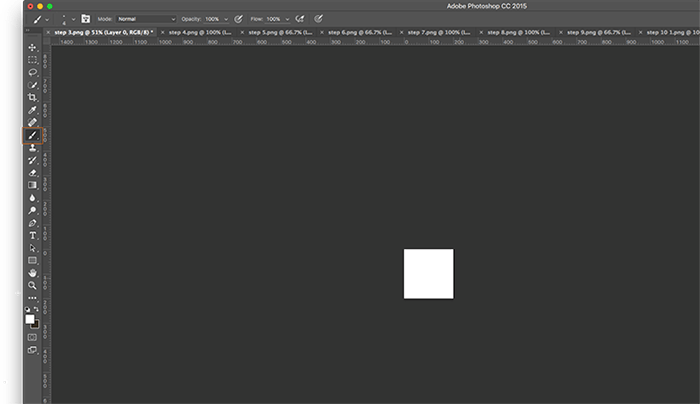
Step 2
Select the Brush Tool
We have outlined the Brush Tool icon in the palette. Click on this to create your new brush.

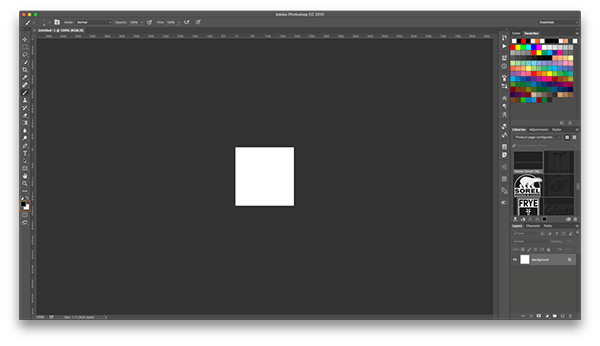
Step 3
Select Your Brush Style
Step three requires you to select your brush tool and style. If you right click, the Brush Preset palette will be displayed. This will provide you with a selection of preset brushes from which you can make your choice. Selecting your brush is straightforward, simply click on the thumbnail. You can then exit by pressing Enter after choosing your brush.
Step 4
Set Your Foreground Colour
As Photoshop uses Greyscale brushes; the black areas are recognised as the brush tip, whilst the white areas are not visible as you paint.
To the left-hand side of your screen you should notice two boxes which we have outlined in red. The larger box represents the white background colour, whereas the smaller box represents the foreground colour.
This is the colour you will use to paint, and is often already set to black as the default. However, if this is not the case selecting the ‘D’ button on your keyboard will return both the foreground and background back to their default colours.
Step 5
Create Horizontal Brush Strokes
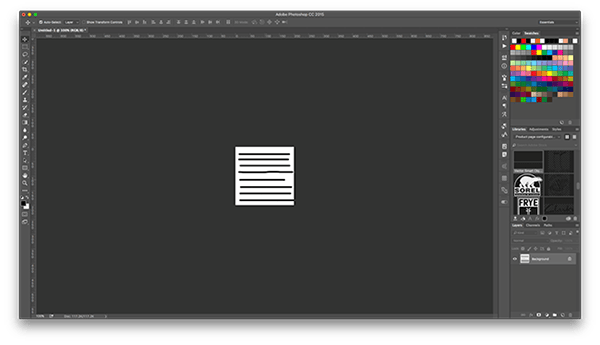
We’ll be creating a brush that creates horizontal stripes. But you can set any design or shape you wish – if you’re designing for wedding stationery, this could be a monogram, or flowers or a striking part of your wedding theme, like foliage or birds, for example.
First you need to create your brush effect. This is a quick and easy step that completes the set-up process before creating your new brush. Simply click on your document window and begin to stroke your brush in a horizontal motion. You can alter your brush size and create strokes of varying thickness. The result should appear similar to this for stripes:
Step 6
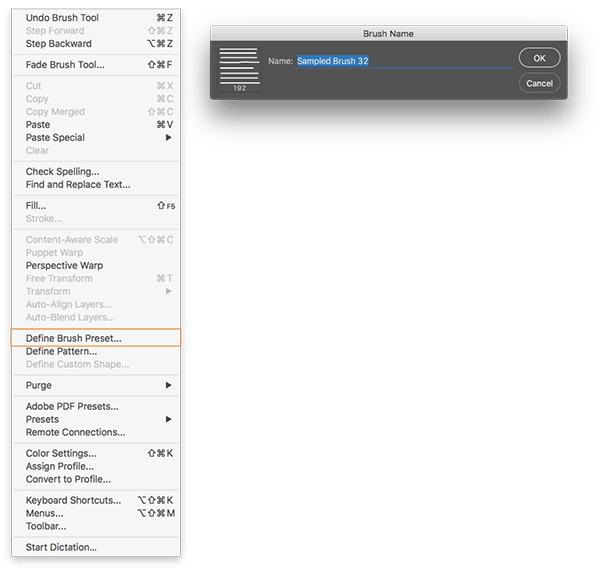
Create, Save and Name Your New Brush
You are now ready to create your custom Photoshop brush. To do this, click on the Edit menu, then select ‘Define Brush Preset…’ from the drop-down list. You will then have the option to name your new brush. After doing so, press OK and close the box.
Well done, you have just created your very own Photoshop brush! You can now exit the document and return to use your brush whenever you desire.
To use your new brush, all you need to do is select the Brush Tool and right click to open the Brush Preset options. Your new brush and any others you have produced will be located at the end of this list. Select the desired thumbnail and press Enter.
Now you can start painting by simply dragging your cursor across the screen. As shown below:
Step 7
Preview Your Brush
To make any changes to your brush you will need to utilise Brush Dynamics, located in the brushes panel. This tool will widen your options when it comes to customising your brush.
Firstly, you will need to select the Window menu followed by the Brushes option at the top of your screen. Following this, Brush Presets should be automatically selected in the top left corner of your screen. Click on the brush you wish to use and a preview of the brush stroke will be displayed. We have outlined this in our example:

Step 8
Amend the Spacing
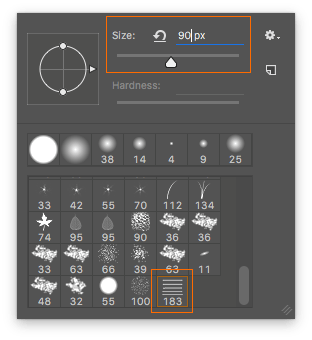
You can alter the shape of your brush tip within the same window. Select the ‘Brush Tip Shape’ box we have outlined to edit the spacing of the tip. Photoshop paints by stamping the brush tip on the document whilst you drag the mouse across the screen. Through altering the space between these stamps, you can edit the look of the brush stroke.
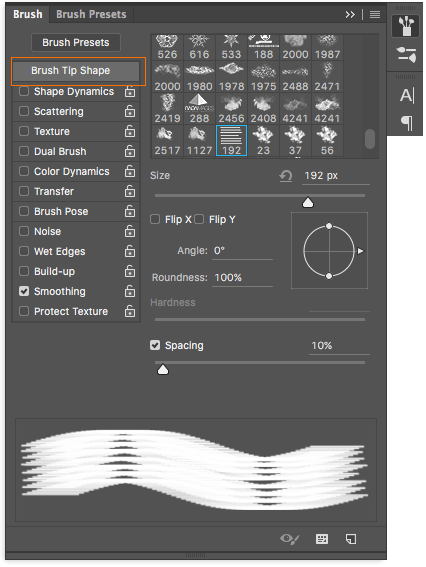
We have highlighted the Spacing panel towards the bottom right of your screen. You can use this to control the spacing of your brush tip. The spacing is currently set at 25%, so if your brush tip width is 100 pixels there will be a new stamp for each 25 pixels.
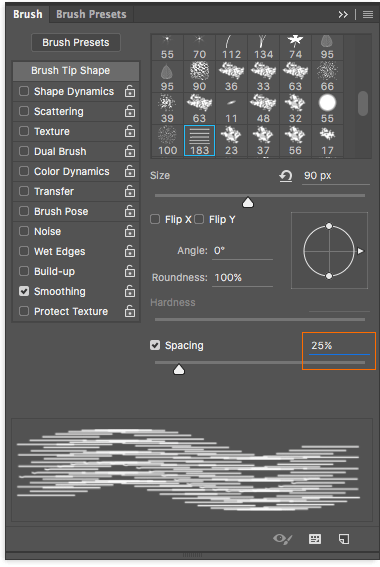
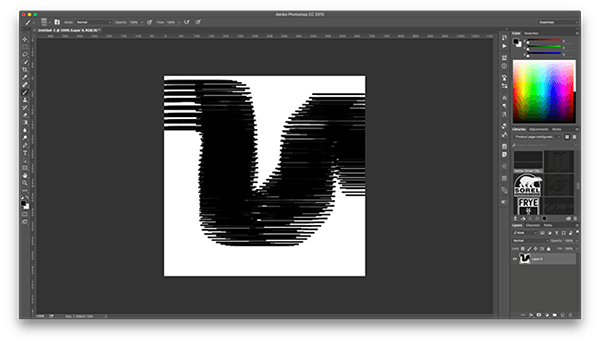
If you want to create a more seamless brush stroke, it is best to reduce the spacing by sliding the bar to the left. This reduces the space percentage; as you can see below:
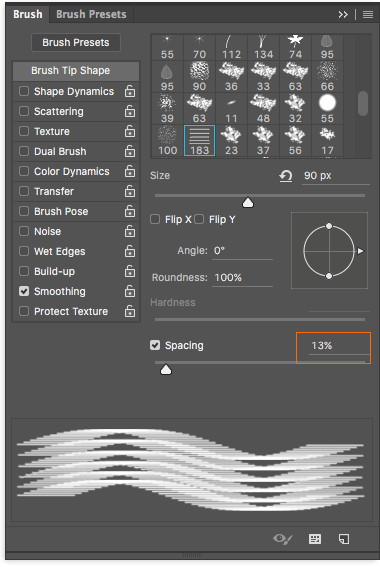
As you can see this creates a much smoother brush stroke when painting:
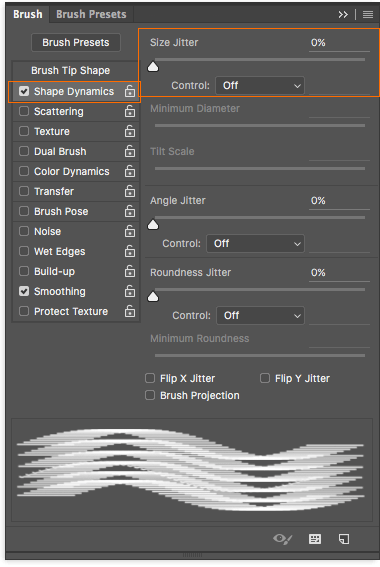
Step 9
Alter the Size and Shape of Your Brush
You can also alter the size, shape and angle of your brush tip by selecting the Shape Dynamics tick-box and then clicking on the words ‘Shape Dynamics’ themselves to display the options. This allows you to adjust the size, angle and roundness jitters until you have the brush tip you desire.
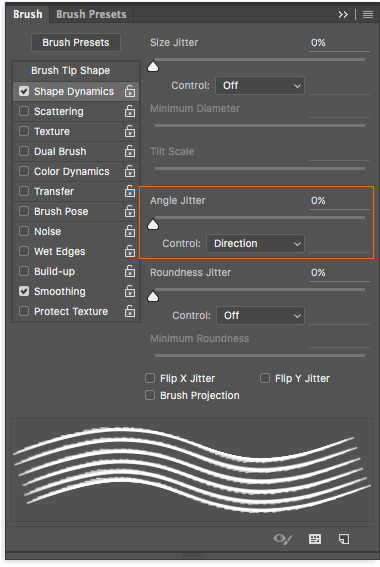
Step 10
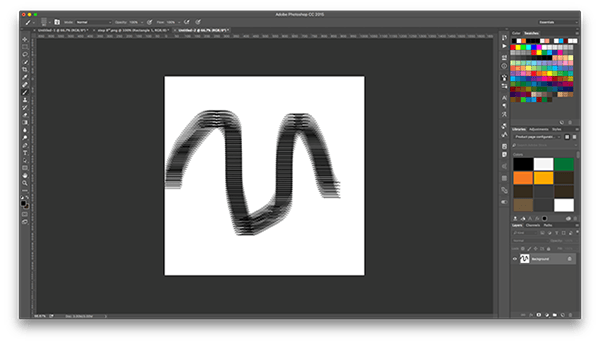
Change Angle Control to ‘Direction’
You’re almost done, but make sure you complete step ten first! In order to ensure your brush tip strokes in the direction of your mouse you need to make changes to the Angle Jitter. This is a straightforward task, simply click on the drop down list next to control and select Direction
.
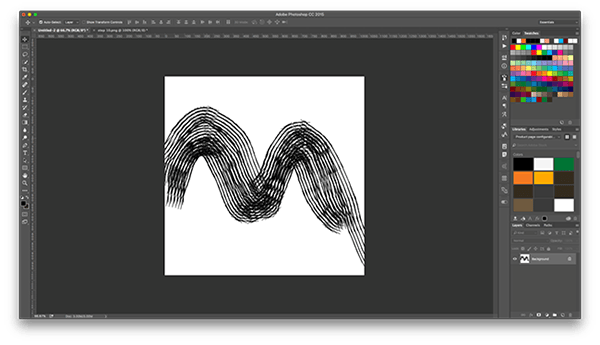
These changes will be reflected in the preview of your brush stroke at the bottom of the page. As you can see, we now have greater control over the direction of our brush stroke:
And that’s it! Easy peasy, no?
Why not go ahead and create your own photoshop brush right now?
Don’t forget to show yours off, oh and of course – add your brand new brush to design to one of our printed products for maximum impact too.
About the author
Our in-house designer Becca has a love of all things creative. When she’s not designing, you can find her in Newcastle checking out independent coffee shops or getting her hands dirty with her house renovation.