Artwork Guides, Inspiration, Wedding
How to master personalisation
Looking for ways to make your print unique? Personalisation is a simple and cost-effective way to ensure your print is more tailored. Whether it’s Wedding Invitations, Greeting Cards or customised Envelopes, mastering the art of personalisation can help you create striking designs with very little effort.
To watch our video tutorial, click here. Or read on as we break down the steps further to turn you into a personalisation pro!
How to add personalisation
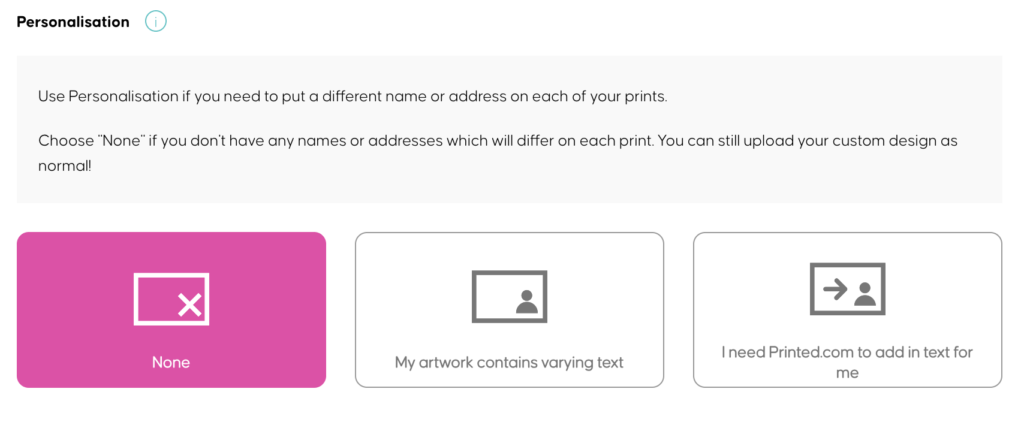
Use Personalisation if you need to put a different text element on each of your prints. For example addresses on your Envelopes, or each guests name on your Wedding Invites.
We offer two ways to personalise your print, so you can choose the route that best suits you! Once you’ve selected all the exciting product details (like size, paper and special finishes), you can choose to upload your artwork using either of the below routes:
- My artwork contains varying text
- I need Printed.com to add in text for me
Artwork contains varying text
You should select this option if you have already merged names or addresses within your artwork and are ready to upload your finished PDF. As these details are added in manually on your side, this option will work best if you only have a few personalised prints to order.
When your design is double-sided, please arrange your pages as follows: Page 1 Front, Page 2 Back. If the back of your design is the same for all versions (non-personalised), we ask that you still include a back page for every front.
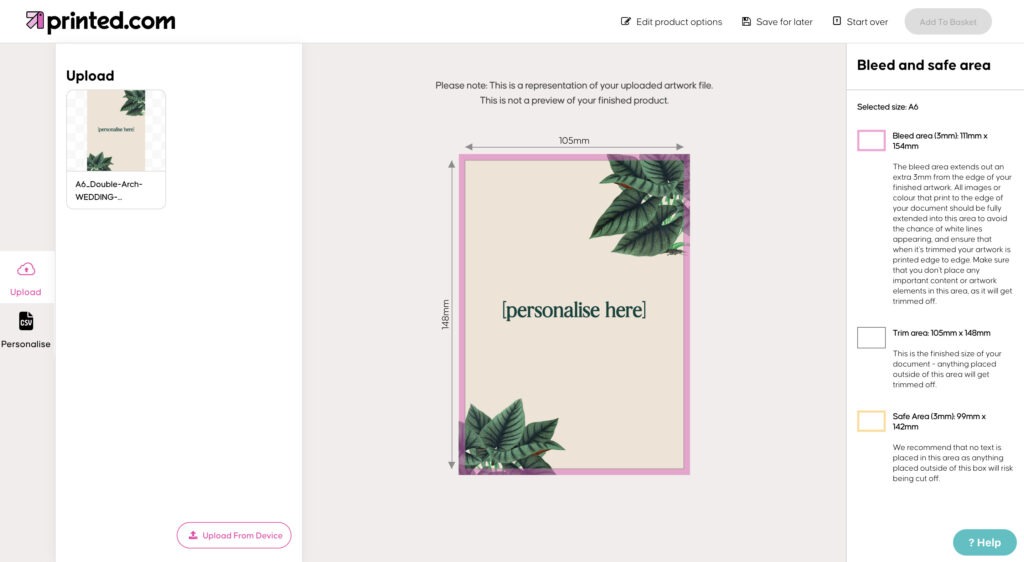
Artwork and data file
If you would like our team to take your artwork and merge it with your names and addresses, you can upload your design PDF with placeholder text in the font and position you would like, as well as a .CSV file containing the list of names or address that will differ on each print. Our team will take your files and personalise your prints for you!
Follow these simple steps to help the team…
- Replace any variable text (e.g. names) in your artwork with [personalise here].
- Create a spreadsheet with all of your variable names in one column. If you want to add addresses too, create extra columns.
- Make sure you spell and capitalise all of your names correctly.
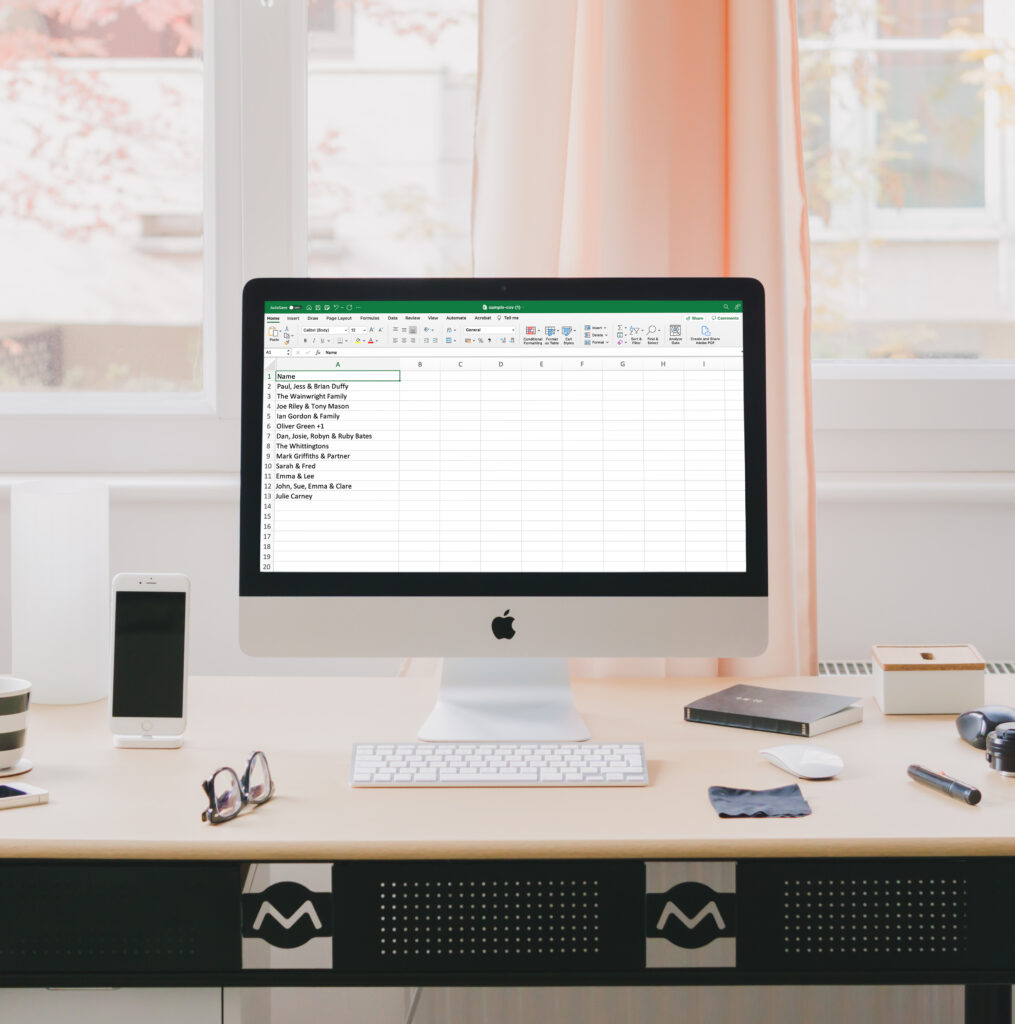
- Save your spreadsheet as a .CSV file.
- Upload your PDF and .CSV file with your order.
Tip: Make sure that your variable text is in the correct font, size and the colour is set to CMYK. Please don’t outline or embed the fonts on your PDF file, as this makes it harder for our artwork team to edit.
And there you have it! Personalisation is available on over 10 of our products, including Invitations, Certificates and Wedding Place Cards. Go forth and get creative!
Still need help? Don’t hesitate to get in touch with the team via email, chat or phone and we’ll be happy to help.
About the author
When she’s not perusing the factory or planning our next product launch, you’ll find Emma doing some form of exercise. Whether it’s her favourite gym class or a walk around Northumberland with friends, she loves keeping fit!
Comments are closed.